![]() One Bicycle,
preferably a racer / mountain bike with curved handlebars.
One Bicycle,
preferably a racer / mountain bike with curved handlebars.
![]() One car
radio OR One car equalizer / amplifier and one Walkman (Personal Stereo.)
One car
radio OR One car equalizer / amplifier and one Walkman (Personal Stereo.)
![]() One 12V
2Ah battery OR 8 AA batteries and holder.
One 12V
2Ah battery OR 8 AA batteries and holder.
![]() 2 or more
speakers, depending on bicycle design.
2 or more
speakers, depending on bicycle design.
![]() Supply of
Sticky Tape and Fencing Wire
Supply of
Sticky Tape and Fencing Wire
![]() Terminal
blocks recommended for connecting wires
Terminal
blocks recommended for connecting wires
![]() One fuse
for safety - inline with Battery.
One fuse
for safety - inline with Battery.
![]() A rear luggage
holder for non-mountain / racer bikes.
A rear luggage
holder for non-mountain / racer bikes.
The choice of radio and speakers if important. My personal recommendation is that you opt for a walkman-based system coupled to a car equaliser / amplifier; as the walkman generally provides superior sound quality to a car stereo and can be removed with ease to reduce the risk of leaving your bike unattended. (The system will not play without one.) However, an ordinary car stereo is also fine, but may be a little bulky near the thighs while riding. Note also that a walkman can drive speakers directly, but quietly in the event of a flat amp / system battery.
Note: Most CD players will not function well on a bicycle - however if you can clip one to your pocket, you may want to include extra cable to facilitate connection to the stereo.
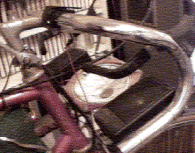
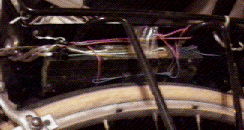
![]() Figure out
where you plan to situate your speakers, amplifier and battery. Remember
that the bike must still be roadworthy after this modification. These are
the suggested locations:
Figure out
where you plan to situate your speakers, amplifier and battery. Remember
that the bike must still be roadworthy after this modification. These are
the suggested locations:
| Mountain / Racing Bike | Standard / BMX bike | |
| Speakers | Mounted on the lower set of handle bars, unless used for riding in the squat position. | Mounted on the rear luggage compartment. |
| Amp / Car Radio | Mounted sideways just below the seat so that it can be supported on 2 sides for greater security. | |
| Walkman (If used) | Mounted in the V at the front of the bike, just before the handle bars. | |
| Battery | If sufficient clearance, underneath the luggage rack. If not, then in the V underneath the bicycle seat. | |
 |
 |
 |
|
![]() Walkman
users: Your walkman is an excellent sound source, and is usually quite capable
of driving an off-the-shelf car equaliser. (Techos - you can locate any damping
resistors inside the equaliser / amplifier and remove them to increase battery
life and volume for the walkman.) A walkman driven system is particularly
recommended for environments where your bike is going to be left unattended
for a period of time, as thieves will generally not be able to get your system
to work without one; as you can take the walkman with you.
Walkman
users: Your walkman is an excellent sound source, and is usually quite capable
of driving an off-the-shelf car equaliser. (Techos - you can locate any damping
resistors inside the equaliser / amplifier and remove them to increase battery
life and volume for the walkman.) A walkman driven system is particularly
recommended for environments where your bike is going to be left unattended
for a period of time, as thieves will generally not be able to get your system
to work without one; as you can take the walkman with you.
 |
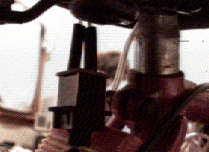
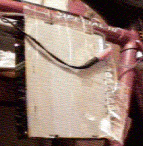
![]() Now test
the system to ensure you are happy with it, and secure the stereo and wires
accordingly. Remember if you engage in off-road riding there will be alot
of vibration and excess force - secure your equipment accordingly. Be sure
to secure it well. Sticky tape (Packing variety) is fine, but will
need to be replaced every 2 months in hot weather.
Now test
the system to ensure you are happy with it, and secure the stereo and wires
accordingly. Remember if you engage in off-road riding there will be alot
of vibration and excess force - secure your equipment accordingly. Be sure
to secure it well. Sticky tape (Packing variety) is fine, but will
need to be replaced every 2 months in hot weather.
Find a familiar and safe area to test-drive your bike. Ensure you are carrying a roll of packing tape for the first few days to fix any bugs that turn up. Some walkman may sound a little funny when going over bumps - you may want to invest in a anti-rolling walkman if this is a problem.